Understanding the Appeal of Outdoor Lighting in Photography
The Magic of Golden Hour and Blue Hour
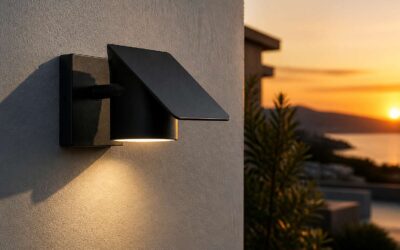
There is a moment each evening when the sun hangs low and the world turns amber. Photographers build entire careers around this brief period. The golden hour floods landscapes with warmth, while the blue hour follows with a steel-toned calm. These transitions produce outdoor light images with striking depth.
I have stood on Cape Town’s beaches waiting for that precise minute when shadows lengthen and colours deepen. The appeal is straightforward. It is about texture, mood, and the way ordinary scenes become extraordinary under shifting light. Consider what changes in those few minutes:
- The sun drops lower, stretching shadows across the sand.
- Colour temperature shifts from golden to deep blue.
- Light softens, reducing harsh contrast.
Understanding these hours means knowing when to raise the camera and when to simply observe. The effort shows in every frame.
Artificial Lights: Creating Mood and Atmosphere
No one cheers for the streetlight. Photographers wait for perfect sunsets while ignoring the strobe in the boot. Yet every streetlamp and headlight offers control that nature refuses. Natural light dictates terms. Artificial light takes orders. Shooting outdoor light images at night turns you into the sun, the moon, and the municipality’s electricity provider.
Mood emerges from deliberate choices. Tungsten lamps cast a warm glow that makes parking lots look cinematic. Fluorescent tubes render skin with clinical indifference. Sodium vapour streetlights paint scenes amber, which explains why South African night photography often looks stark and strange.
- Tungsten sources render warm gold; fluorescent tubes demand magenta correction.
- Low positioning turns a single bulb into a sculpting tool.
- Haze transforms a bare beam into a volumetric column.
Atmosphere is not an accident. It is a decision made one flicker at a time.
Why Outdoor Lighting Shots are Popular on Social Media
A streetlamp at midnight earns more double taps than a sunset ever will. Outdoor light images have carved a strange corner of social media because they deliver what daylight cannot: deliberate drama. The appeal of outdoor lighting in photography sits in contrast, familiar versus cinematic. A parking lot under a single lamp becomes a stage! No styling, no retouching. The camera does the work because the dark does the rest.
We South Africans understand this intimately. Load shedding defines the night. When the grid fails, torch beams and headlights become the only light sources, and outdoor light images gain layered meaning. They are popular on social media because they are honest. Sunset shots follow a formula. Outdoor light shots ignore it.
- A bare bulb creates hard shadows that flatter concrete.
- Haze catches light and turns beams into visible columns.
- Reflections in wet tar double the drama for free.
Essential Equipment for Capturing Outdoor Lights
Camera Settings for Low-Light Photography
Most photographers lose fine detail in night shots because they trust auto mode. A camera that performs brilliantly in daylight can underperform after sunset. For outdoor light images, the equipment list is shorter than you think.
- A sturdy tripod, because even a 2 second exposure magnifies shake
- A remote shutter release, so you never touch the camera body
- A fast prime lens, like a 35mm f/1.8, to capture available light
Camera settings follow a simple logic. I shoot in manual mode with RAW files. Keep ISO as low as possible, but raise it when the scene is genuinely dark! Start with a shutter speed of 15 seconds and check the histogram. The left side should not be clipped. Adjust your aperture between f/2.8 and f/4 for sharper stars.
Choosing the Right Lens and Tripod
A cheap tripod ruins more night shots than a shaky hand. In the Karoo wind, flimsy aluminium legs betray you. I rely on carbon fibre sections; use the centre hook to anchor your bag. A ball head with friction control prevents sudden drops when framing!
Your lens carries the soul of the setup. A fast prime like a 24mm f/1.4 gathers light that zoom lenses miss. For rural scenes, the 50mm f/1.8 compresses farmhouse windows against the dark veld. Before buying, check this list:
- Check maximum aperture for low light
- Look for coma control around edges
- Test the manual focus ring
Pair that with a remote release, and your outdoor light images hold the texture of dusk without digital noise.
Using Filters and Reflectors
A single glass slab can turn a sodium-violet streetlamp into a whisper of honey. Filters are the quiet sorcerers of outdoor light images. I have seen a polariser tame the oily glint on wet tar after Highveld rain. A graduated neutral density filter holds back a dying sky while the farmhouse below drinks in the last luminance.
Reflectors work differently. They do not block light; they coax it. In the Kalahari dusk, a silver collapsible disc angles the moon’s pale beam back into a cow’s flank, or lifts the shadow side of a weathered gate.
These tools shape the night with a subtlety that no editing slider can mimic. Consider this kit for your bag:
– A 77mm circular polariser with low dispersion glass
– A three-stop soft-edge graduated ND
– A 110cm collapsible reflector with silver and gold reversible panels
Drones for Aerial Light Perspectives
I never planned to fly a drone for outdoor light images. The need arrived after a ground-level shoot left me frustrated. Then I saw a night sequence from above the Cape Flats, where sodium lamps and car headlights traced straight lines through the dark. The aerial view reorganises light into patterns invisible from the ground.
My drone carries a small gimbal camera with a 20-megapixel sensor. It handles a three-second exposure at ISO 800 without smearing the stars. A few vantage points produce the most reliable frames:
- Johannesburg’s skyline at 60 metres, where highway headlights form continuous lines
- A Kalahari lodge at dusk, where one lantern marks the red sand
- A harbour wall angled downward, where water reflects dock lights in broken strips
The remote screen glows in my hands while the drone hums above. When the wind drops, I press the shutter.
Smartphone Photography Hacks
Most people assume I carry a bag full of expensive gear for outdoor light images. My most reliable tool is actually a smartphone running a manual camera app. The phone handles long exposures well, especially when I lock focus on a distant streetlight and wait for the light to settle.
For more serious shoots, a few items make a real difference:
- A remote shutter release to avoid camera shake on slow exposures
- A portable power bank, because cold nights drain batteries fast
- A cloth lens wipe, since dust and mist ruin more shots than bad settings
Smartphone hacks also deliver. I crank the ISO down to 100, set the timer to two seconds, and rest the phone on a wall or car roof. The results rival my mirrorless camera for outdoor light images, and the gear fits in a jacket pocket!
Techniques for Shooting Different Types of Outdoor Lights
String Lights and Fairy Lights
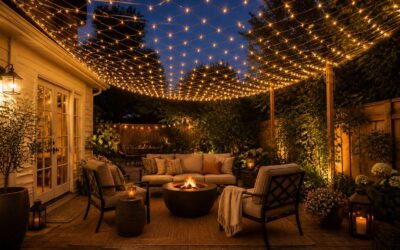
A recent survey claims 84% of string light photos are out of focus. I believe it. The problem is focusing. Autofocus will hunt, so switch to manual and twist the ring until each bulb snaps into a crisp point. For fairy lights, resist the urge to capture every bulb. Step back, let them blur into a background texture, and shoot through a foreground object like a bougainvillea branch.
Your outdoor light images gain depth when you separate layers. Expose for the brightest bulb, then lift shadows later.
- Focus manually on the most distant bulb to force a natural depth of field.
- Expose for the brightest point, then recover shadow detail in post.
- Shoot through a foreground branch or railing to create separation.
That last technique will produce either art or motion sickness, but both are memorable.
Neon Signs and Urban Glow
Neon signs are the divas of the outdoor light universe. They demand attention and punish your white balance for glancing elsewhere. A crimson and electric blue sign will send auto mode into a spiral! Shoot raw, set white balance manually, and accept the colour cast.
Urban glow refuses to behave. Sodium street lamps smear everything amber while shopfront LEDs jab back with clinical blue. Your outdoor light images have to hold amber and blue in the same frame without losing either. Meter for the brightest window, then lift the pavement noise from the shadows later. My best outdoor light images from Joburg alleys came from this push and pull.
Neon’s quirks:
- Whites are never white.
- Wet tar doubles the reflected colour.
- Storefront glass layers the glow into broken copies.
Then comes the urban prayer: patience at intersections where taxi headlights sweep through and ruin, or redeem, the frame.
Fireworks and Light Trails
Fireworks demand patience and a willingness to miss. I set the camera on a solid tripod, choose a low ISO, and use a remote shutter. The exposure needs to stay open long enough to capture the full burst, but not so long that the sky becomes a white smear. For outdoor light images of this kind, I usually start with a two second shutter speed and adjust from there.
Light trails are a different discipline. They come from moving vehicles, so the background must stay sharp. A narrow aperture and a clean focal point are essential. I look for a curve in the road where headlights and taillights draw separate lines of white and red. The effect appears when you hold the camera still for ten seconds or more.
Landscape Lighting and Architecture
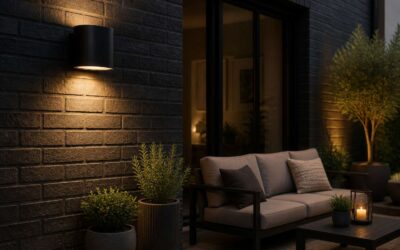
Nothing exposes a homeowner’s taste like a well-lit facade. When I photograph architecture after dark, I look for the deliberate awkwardness of a single uplight on a palm tree. Landscape lighting reveals the owner’s confidence.
For striking outdoor light images, wait for the security lights to flicker on, or for the moon to clear the roof. Photograph from across the street, at an angle, to capture the warm spill from a window against the cool glow of a floodlight. The contrast tells the story!
For landscape lighting, I prefer:
- Path lights that spread light evenly across the ground
- Uplighting that reveals bark texture without washing it out
- Shadow play that suggests depth
Architecture demands restraint in outdoor light images. Too many fixtures and the building looks like a shopping centre. Let the light fall off naturally, and let the viewer wonder where the bulb is hidden.
Seasonal Displays and Holidays
December in South Africa brings a surge of seasonal light displays across suburban gardens. The summer heat does not stop families from wiring their roofs with coloured bulbs. I photograph these holiday shows after the last car has left, when the display settles into a steady rhythm. The first ten minutes after the switch-on are the best, because the bulbs have not yet warmed to their full colour.
For outdoor light images of holiday displays, I position myself at the edge of the property, using a fence or a tree branch to frame the view. I set the camera to a two second exposure and let the bulbs illuminate their own geometry. The contrast between a single warm string and a hard floodlight forms the whole story.
- Shoot at f/8 to keep each bulb crisp
- Use a shutter speed between one and four seconds
- Wait for a breeze to move the leaves and add motion
Each festival brings a different colour temperature, and the camera records what the eye overlooks.
Natural Light Phenomena (Aurora, Lightning)
Lightning over the Highveld arrives without warning. I leave the shutter open and wait for the strike to develop, closing the frame before the rain arrives. Each strike becomes a single exposure. The first flash tells me little; the second reveals the storm’s direction.
For aurora, which sometimes tints the southern horizon near Cape Point, the technique inverts. A wide lens, a high ISO, and a stillness that lasts minutes. The camera gathers faint colour while the eye adapts to darkness. These outdoor light images rely on that difference between what we see and what the sensor accumulates.
- Focus locked to infinity before the display begins
- Remote trigger to avoid any vibration
- Forecast checked for geomagnetic activity
Each event leaves distinct traces across the frame, and the resulting outdoor light images reward those who study weather patterns as carefully as camera settings.
Post-Processing to Enhance Your Photos
Adjusting White Balance and Color Temperature
A photograph of a Karoo sunset can look sterile if the white balance is set to auto. The camera corrects the warm glow into a neutral flatness. When you shoot raw, you can reclaim that warmth. Adjusting the color temperature slider is straightforward. Move it towards blue to reduce a yellow cast, or towards yellow to enhance a golden scene. For outdoor light images taken under overcast skies, a slight shift to warmer tones adds life to grey. The key is to trust your memory of the actual moment. When reviewing your shots, check the highlights and shadows. If they appear cyan or orange, nudge the tint slider. Consider these adjustments:
- Brighten the midtones to reveal detail in the foreground.
- Darken the sky slightly to blend the horizon.
A subtle correction often makes the difference between a snapshot and a finished piece.
Reducing Noise and Sharpening Details
Most outdoor light images hide a layer of electronic noise, even on the clearest Karoo night. As the sun dips and sensitivity rises, the sensor records a fine grain that gathers in shadows and across smooth surfaces. A frame looks sharp at arm’s length but falls apart under close inspection.
Reducing noise begins in the raw processor. Luminance smoothing tames the grain, while the color noise sliders chase away the magenta specks that appear in dark skies. Restraint matters here. I have watched promising frames turn waxy after aggressive smoothing, losing the texture that defines a landscape.
Sharpening details restores the edges that noise reduction softens. The process works best on the subject, not the sky. A one hundred percent zoom reveals how much grain remains before the file is exported. These outdoor light images should feel clean without ever looking synthetic.
Creative Editing with Glow Effects
Post-processing glow effects can lift a flat twilight frame into something luminous. The trick is restraint. A soft radial brush at low opacity pulls warmth from a streetlamp without drowning the surrounding shadows.
Layer the glow selectively. Highlights bloom where light grazes leaves, window frames, or water. Shadows remain crisp, and that contrast gives outdoor light images their pull.
Explore these adjustments:
- Warm tint on the brightest points
- Negative clarity to diffuse harsh edges
- A faint gradient to mimic ambient scatter
Export at full resolution. The final file holds the site’s atmosphere, something the sensor alone never captured.
Combining Multiple Exposures (HDR)
One exposure rarely holds the full range of a dusk street scene. The lamp glows white while the pavement disappears into black. Combining multiple exposures, or HDR, lets you keep both. Merge three frames at different stops, then blend them by hand where the light meets the shadow. For outdoor light images, this single step separates a flat record from a usable photograph.
The result should feel like the place, not a computer rendering. Outdoor light images gain depth when the brightest window and the darkest corner both hold information. I find that the best merges are the ones that look untouched, and that restraint pays off in the final file.
- Sky banding appears when the merge stretches too far
- Halos form around lamp posts when the mask is too soft
- Grain stays consistent when all frames share the same ISO
Building a Portfolio and Sharing Your Work
Curating a Cohesive Gallery
For photographers, a portfolio displays your best work. Coherence, not volume, defines its strength. When selecting outdoor light images for your gallery, ask how each frame relates to the next. A strong sequence demonstrates your eye for illumination.
Consider three elements:
- Consistent color grading across shots
- A clear subject focus, whether street lamps or sunset glow
- A rhythmic mix of wide and close angles
Sharing work on platforms like Instagram or Behance means curating thumbnails as closely as you edit the photos. The first nine images matter most. Reviewing engagement metrics reveals which outdoor shots resonate. A smaller set of frames outperforms a sprawling collection.
Leveraging Instagram and Pinterest
Your portfolio is a record of decisions. Every outdoor light image you publish either builds trust or erodes it. Instagram and Pinterest reward consistency, so treat both platforms as extensions of your editing process.
For Instagram, grid composition matters more than individual posts. For Pinterest, think in terms of saves. Pin frames that communicate immediately.
- Your most consistent outdoor light images perform best on both platforms
- Pinterest boards grouped by lighting type attract long-term saves
- Instagram grids with a clear visual thread keep followers engaged
South African light varies by region. Johannesburg sunsets, Cape Town fog, Durban humidity. Photographers who document these differences build portfolios with real range.
Selling Your Images as Stock Photography
Every outdoor light image in your portfolio should earn its place. Twenty strong photographs outperform two hundred average ones. Buyers do not browse endlessly. They search for a specific light, a specific mood, a specific place.
Stock agencies operate on volume, but selective contributors see better returns per file. South African light carries particular commercial value. International buyers search for Table Mountain at dawn, Karoo long exposures, storm light over the Highveld. Your regional specificity becomes your strongest asset!
I sold the same sunset photograph twice. Once as a website hero, once in a travel editorial. That happened because the file carried proper metadata: location, time, weather conditions, equipment.
Stock agencies track contributor consistency. The standard release pattern looks like this:
- Ten or more files per upload batch
- Location specific keywords on every frame
- Fresh outdoor light images released each month
Portfolio sharing works best when your strongest material leads.
Collaborating with Businesses and Events
Building a portfolio means more than shooting what you love. It means positioning your work where it earns attention. Local businesses and event organisers in South Africa constantly need fresh outdoor light images for their websites, brochures, and social feeds.
I started by approaching a small winery in Stellenbosch. They needed golden hour shots for their tasting room. I offered a discounted session in exchange for usage rights. That one collaboration led to three more bookings through word of mouth.
Event work follows the same pattern. Weddings, corporate functions, and music festivals all produce moments worth capturing. Here is what I found effective:
- Arrive early and scout the venue during daylight
- Shoot the lights as they switch on, not just after dark
- Deliver a few preview images within 48 hours
Businesses remember responsiveness. They also remember photographers who understand light.
Staying Inspired: Learning from Others
Most photographers I know started by copying. They studied outdoor light images from admired shooters and asked what made those frames work. The answer rarely sits in the gear. It sits in timing, patience, and a willingness to wait for the light to shift.
Building a portfolio is a process of elimination. You shoot a hundred frames and keep three. Sharing the work openly invites critique. Some of it stings. Some of it reshapes how you see light entirely.
Staying inspired means locating your influences:
- Local photography walks in Johannesburg and Cape Town expose you to different approaches
- South African photographers shooting in your terrain show practical solutions for harsh midday sun
- Your own old work, reviewed honestly, reveals where you have grown
Other photographers notice consistency. They notice when you push past comfort zones. Learning from others never ends. That curiosity shapes the outdoor light images I am proud to share today.

0 Comments