Benefits of Exterior Recessed Fixtures
Enhance Curb Appeal and Home Value
South African buyers form opinions within seconds of arriving at a property. Exterior lighting shapes that first glimpse, and outdoor can lighting delivers an elegance that surface fixtures cannot match. It defines the home’s character before anyone steps inside.
Recessed units sit flush against ceilings or eaves, drawing attention to the architecture itself. They create shadows, emphasise stonework, and direct the eye along pathways.
- Warm colour temperatures create a welcoming atmosphere
- Precise beam angles reduce light pollution
- Durable housings withstand coastal and Highveld weather
This visual refinement signals a home maintained with intention. Estate agents and appraisers recognise the cue, and valuations respond accordingly.
Improve Safety and Security Around Entrances
The edge of the beam is the true boundary of your home. In the half-light before an entrance, every recessed fixture provides a clear field of view. Outdoor can lighting, aimed low and tight, removes the concealment that thieves rely on. It reveals the irregular flagstone, the worn step, the visitor who hesitates at the threshold.
This focused illumination does not scatter into the sky. It stays where the risk lives. Motion sensors hidden in the housing react to approach, a silent shift from dark to full clarity.
- Deter loiterers who exploit unlit corners
- Expose trip hazards on the pathway
- Make face recognition possible at night
Corrosion resistant materials hold up against coastal salt and Highveld storms, so the protection persists season after season.
Create Ambiance for Outdoor Living Spaces
Somewhere between the first fire of the braai and the last glass of wine, the outdoor space changes character. That shift is not accidental. Outdoor can lighting, recessed into a pergola beam or a sunken ceiling, draws a warm gradient across the table without turning the yard into a floodlit sports field. The light pools around the conversation, leaving the borders in shadow.
Unlike a single glaring globe, these fixtures create layers: a soft wash for the dining zone, a graze across the stone wall, a pinpoint on the herb planter. The effect is subtle, but it changes how people stand, move, and linger. Outdoor can lighting also rescues neglected corners. Consider what a small recessed beam can revive:
- the pathway to the herb garden
- the crack between the braai and the wall
- the decorative olive tree in a pot
These accents do not shout. They make the space feel arranged.
Energy Efficiency with LED Options
South Africa’s electricity tariffs have climbed far faster than household incomes for over a decade. Municipal invoices provide the evidence. That makes the energy efficiency of exterior recessed fixtures a matter of monthly arithmetic, not vague sentiment.
Modern LED outdoor can lighting draws a fraction of the wattage that halogen alternatives consumed. A single 10 watt LED downlight produces roughly the same beam as a 50 watt halogen fitting, and it does so without heating the surrounding structure as much. For anyone with several fixtures recessed into a pergola or ceiling, the savings accumulate quickly.
The practical differences from LED options are measurable:
- Power draw per fitting drops by roughly 80 percent.
- Heat output falls, which protects timber beams and paintwork.
- Lifespan reaches 25,000 hours or more, so replacements become rare.
Outdoor can lighting can still be a design feature while keeping the running cost manageable.
Types of Outdoor Downlights and Trim Options
Fixed vs. Adjustable Gimbals
Most people blame the bulb when their patio ends up with harsh shadows. The real culprit is often the trim. Fixed trims lock the lamp in place, which works well for washing a wall or lighting a doorway. Adjustable gimbals let you tilt the housing, so you can aim at a tree canopy or graze a textured facade. This matters in South African homes, where verandas and braai areas rarely have symmetrical ceiling lines.
- Fixed trims: uniform, wide light with no moving parts.
- Adjustable gimbals: targeted light, but require deeper housing clearance.
Gimbal mechanisms add height, so check your recessed housing before committing to outdoor can lighting. Both trims support LED retrofit bulbs, but the beam spread changes how the space feels at night. A fixed trim delivers even brightness; a gimbal creates contrast and shadow. The right choice depends on whether you want to light the whole area or one specific feature.
Baffle vs. Reflector Trims for Glare Control
Glare ruins more outdoor spaces than bad wiring. You step onto the patio, and the downlight blasts your retinas. Baffle trims solve this with ridged interiors that trap stray beams. Reflector trims do the opposite, bouncing every ray outward. For outdoor can lighting, this distinction controls whether guests squint or settle in.
Downlight housings vary in depth. Shallow units accept baffles well. Deep housings let reflector trims perform. I have watched homeowners swap trims and transform a space! The trim, not the bulb, often dictates the comfort.
- Baffle trims: low glare, matte appearance
- Reflector trims: high output, shiny finish
Match the trim to the ceiling height. A baffle softens a low braai area. A reflector suits a tall entrance. Choose deliberately.
Low-Voltage Landscape Can Lights
Low-voltage landscape can lights run at 12 volts, so they survive rain, sprinklers, and soggy ground. These fixtures depend on a transformer to step down the household current. Trim options for these small housings include fixed flat plates, adjustable shrouds, and lensed covers.
For outdoor can lighting, the trim selection changes the beam shape and the visual footprint:
- Fixed flat trims create a wide, even wash for garden beds.
- Adjustable shrouds direct light onto a single trunk or art piece.
- Lensed covers diffuse the glow for pathway borders.
The transformer’s wattage caps the number of fixtures you can connect. The planting density and viewing distance determine the ideal trim. A shallow recessed housing takes a shorter bulb, while deeper units allow for more beam control.
Installation Considerations for Outdoor Ceiling Lights
Choosing the Right Housing for Insulation Contact
One wrong housing choice makes outdoor can lighting heat the attic directly. In South Africa, where summer temperatures already test your roof, that risk is unnecessary. If your ceiling contains insulation, the housing must be IC-rated, meaning it can contact insulation without overheating. Non-IC housings require clearance, and achieving that clearance means removing insulation, which defeats the purpose.
The right housing answers these three questions:
- An IC rating stamped on the housing label.
- Compatibility with your bulb type, including LED retrofits.
- Airtight construction to prevent airflow leakage.
I have seen attics with charred rafters from this exact oversight. An IC-rated housing costs slightly more, but it saves you from a hazard and a pointless energy bill. The investment pays off.
Proper Spacing and Layout for Even Illumination
Night falls fast in Johannesburg, and a badly spaced light leaves a pool of darkness where you least want it. Outdoor can lighting demands a layout that treats shadows as the enemy. I measure the ceiling first, then mark each position with chalk. The rule that never fails: place fixtures no further apart than half the mounting height. For a 3 meter ceiling, that means 1.5 meters between cans. Wall washing needs closer spacing, around 600 mm, to create that seamless curtain of light. The variables that shift everything:
- The beam angle of your chosen LED trim
- The reflective surface of your ceiling material
- Obstructions like beams or ceiling fans
A grid that looks even on paper can betray you at night. Walk the space at dusk, switch everything on, and watch where the shadows actually fall. That moment reveals what the drawings never will. This is where outdoor can lighting earns its reputation, or destroys it.
Electrical Wiring and GFCI Requirements
A single miswired outdoor light can trip every breaker in the house. Outdoor can lighting demands more than a pretty trim, it demands respect for the current flowing through it. I have opened junction boxes that looked like birds’ nests, wires twisted together with tape and hope.
South African regulations require a licensed electrician for any fixed outdoor wiring. For outdoor can lighting, the circuit needs proper earth leakage protection, which is our local version of GFCI. Each fixture should run on its own dedicated circuit where possible, or share one with a generous amp rating.
- Use outdoor rated cable with a UV resistant sheath
- Seal every connection in a weatherproof IP65 junction box
- Fit a residual current device rated at 30 milliamps
Moisture finds every weak spot. The GFCI requirement exists because water and electricity mix badly on a rainy Highveld afternoon. A test button sits there for a reason, and ignoring it only postpones the moment of discovery.
Weatherproofing and Sealing Against Moisture
Outdoor can lighting lives in a hostile world. The Highveld delivers hail, UV radiation, and rain that finds the smallest breach. Coastal homes contend with salt-laden air that corrodes terminals in a single season. I have pulled trims from ceilings where moisture had already turned the screws to rust.
Start by inspecting the housing itself. Cast aluminium or marine-grade stainless steel resists corrosion best. Check the gasket around the trim; a warped gasket admits moisture. Replace it with a silicone rubber version. Apply dielectric grease to the bulb socket and exposed metal contacts.
- Seal housing edges with a pliable butyl sealant, not hard caulk that cracks
- Tilt recessed housings slightly so condensation drains outward
- Fit a vapour barrier between the ceiling cavity and the fixture
Every screw, seam, and wire entry point is a potential leak. For outdoor can lighting, take the extra minute to reapply sealant after installation. The next storm will test your work soon enough.
Retrofitting Existing Exterior Light Sockets
Most exterior light sockets were never designed to host outdoor can lighting. Their flimsy mounting tabs and shallow junction boxes struggle with the extra depth and weight. Retrofitting starts with the box, not the fixture. Measure the internal volume and confirm the earthing is intact. South African homes built before 1990 often hide cracked insulation behind the plaster.
Use a metal mounting bracket made for recessed housings. Never force the fixture into a crooked position. A housing that leans even a few degrees will throw light in the wrong direction and invite dust entry. The existing switch loop may also lack a neutral, a problem for smart LED retrofit kits.
– Verify the box is fully recessed and not proud of the ceiling
– Check that the knockout holes align with the mounting screws
– Confirm the wall switch is rated for the LED load
This process turns a simple swap into a proper installation, one that will survive the Highveld summers and coastal winters.
Design Ideas for Patio and Porch Lighting
Highlighting Architectural Features with Accent Lighting
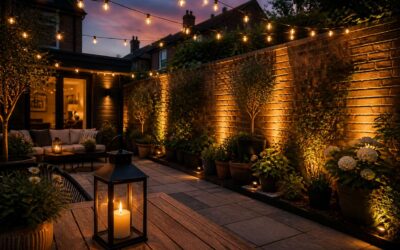
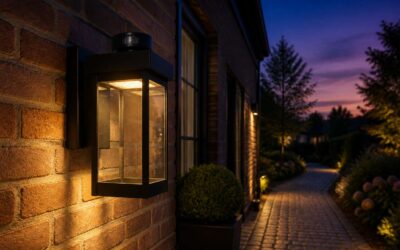
A single line of light can change how a home feels after sunset, turning familiar shapes into quiet statements. Outdoor can lighting excels at this, especially when aimed upward to graze brick or cladding, revealing texture that flat daylight hides. On a porch, positioning fixtures near the eaves creates a scalloped shadow pattern that adds depth to plain ceilings.
For patios, focus on the bones of the structure:
- Exposed rafters with warm beams
- Stacked stone columns with a soft wash
- Door surrounds with narrow focus accents
Each placement should read as deliberate, not decorative. The goal is to let the architecture speak without shouting, using contrast rather than overwhelming brightness. When done well, the house feels anchored to the evening landscape.
Layering with String Lights and Lanterns
A single string of lights never saved a dark corner. Outdoor can lighting does that quiet work. Lanterns provide warmth, but they leave gaps. I have seen patios where the perimeter disappears after sunset. Place lanterns on railings for closeness. Hang string lights above to frame the seating. Then use outdoor can lighting near the house wall to clear the shadows.
- Lanterns for low, intimate glow
- String lights for overhead shape
- Recessed fixtures for clean edges
Each layer answers a different question the evening asks. Without all three, the porch feels either too bright up close or too empty at the edges. In South Africa, where outdoor living extends deep into the night, this balance becomes necessary. The result is a space that feels inhabited, never just illuminated.
Using Dimmer Switches for Versatile Moods
The layers only realise their potential when controlled. Dimmer switches give command over outdoor can lighting without reconfiguring fixtures. A fixed switch forces a choice between glaring brightness and darkness. A dimmer opens the space between those extremes.
The course of an evening in South Africa changes. Early braai demands clear light for food and faces. Later, guests want shadows. Turning the dimmer down shifts the mood without anyone leaving the table. The fixture stays the same; only the light level changes.
Mixing Recessed Lights with Pendant Fixtures
A South African patio rarely asks for a single light source. Mixing recessed outdoor can lighting with pendant fixtures gives a porch both structure and warmth. The recessed units, tucked into the ceiling, wash the floor in even illumination. Pendants hang lower, casting focused light onto a dining table or seating area.
Proportions matter! A low ceiling suits compact pendants. A double-volume veranda can handle larger shades. Outdoor can lighting covers the open spaces between pendants, while pendants claim their own zone.
- Warm LED lamps in both fixture types keep the colour consistent.
- Pendants work best over gathering points.
- Recessed lights handle walkways and thresholds.
Separate switches for each layer let you shift from bright to intimate without replacing a single fitting.
Maintenance and Troubleshooting for Exterior Can Lights
Cleaning Lenses and Replacing Bulbs Safely
A single blown lamp in a recessed fitting can leave your stoep in murky half-light. Cleaning the lens often solves the problem first, because dust and insect residue dim even the brightest LED. Use a dry microfiber cloth for routine wipes; for stubborn grime, a slightly damp cloth with mild soap works well. I always switch off the power at the breaker before touching any component.
When replacing bulbs, wait for the housing to cool completely! Twisting a new lamp into a hot fitting risks thermal shock and cracked glass. For outdoor can lighting, check the trim ring for corrosion before reinstallation. If a light flickers or trips the GFCI, inspect the socket and wiring connections rather than simply swapping the bulb.
- Turn off power at the circuit breaker.
- Allow ten minutes for cooling.
- Remove the trim and lens carefully.
- Install the correct bulb type.
- Reassemble and restore power.
Dealing with Condensation and Insect Intrusion
Moisture inside an exterior fitting often appears as a persistent fog on the lens, a sign that the seal has aged or the housing has a hairline crack. In coastal South Africa, salt-laden air accelerates this. When condensation lingers, it corrodes the socket and shortens the lifespan of your outdoor can lighting.
Insects find these warm enclosures equally inviting. Small moths and geckos enter through gaps around the trim, leaving debris that attracts spiders. A seasonal gasket inspection prevents most intrusions. I prefer a thin layer of dielectric grease on the rubber seal to repel moisture. For persistent condensation, use a breathable membrane made for outdoor can lighting. It equalizes pressure while blocking water droplets. Ignoring these signs leads to rusted springs and flickering connections, so a proactive look saves a full replacement later.
Fixing Flickering Issues and Loose Connections
Flickering in exterior fixtures rarely begins at the bulb. More often, it announces a loose connection behind the trim, where vibration and thermal expansion have freed a terminal screw. For outdoor can lighting near the coast, corrosion on the wire increases resistance until the light pulses. That pulse is a warning.
Start by killing the circuit at the breaker. Then remove the trim and inspect the wire nuts. If any twist feels slack, replace them. Check the socket’s spring contacts as well; a flattened spring loses its grip on the lamp’s base.
- Pull each wire to test for secure crimps.
- Apply anti-oxidant paste to exposed copper.
- Retighten mounting screws before reinstalling the trim.
These measures address most intermittent flickers. Persistent issues point to a damaged switch or a failing driver, requiring a look at the housing behind the wall.


0 Comments